Here is my take on the Apple Pie. Two-bite Apple Pie so you have room for every other dessert served on Thanksgiving! Yes, it is this time of year. Everyone is looking through their favorite Thanksgiving recipes trying to decide what to make this year. Is it going to be the same menu like always or are some changes needed? Was the stuffing as flavorful as you hoped last year or was it too dry and blah? How about creamed spinach, green beans or cranberry sauce? And desserts, of course! What was a big hit? Did uncle John have 3 servings of your Triple Chocolate Pumpkin Pie? I’m looking through my recipes, too, thinking I’m going to try a new recipe or two. A new dish might, just might, become your new favorite and replace the usual green salad or the way you serve an apple pie.
This recipe is a very cute way to serve the apple pie. Two-bite apple pie. This way you can try every dessert that’s being offered instead of having just one big slice of the pie. Making a pie dough can be intimidating to many people but it’s actually very easy. Just use very cold butter, icy water, don’t over mix the dough and chill it before rolling.
For the apple pie filling I used a chunky applesauce I made earlier. I used Pippin apples that we bought from a small, unattended fruit stand, you know, the kind where you put as many apples as you want into a bag and then put $4.00 into a slot in a pole. Pippin apples are as American as apple pie! They were developed in the early 1700s and were the favorite apples of Thomas Jefferson and Benjamin Franklin. Pippins are available in the fall and winter only. They have green skin, crunchy and juicy flesh and are slightly sweet and spicy. Pippin apples are great for juicing and baking, since they cook down easily.  To make the applesauce, I peeled, cored and sliced the apples, then cooked them on medium/low heat for about 40 minutes. It’s good to add about 1/2 cup of water or apple juice at the beginning so the apples won’t burn. Stir frequently. To emphasize the apples’ flavor squeeze in some lemon juice. Add the sugar toward the end since it burns easily, as well as the cinnamon. To prepare the applesauce as the pie filling, add raisins and stir.
Originally, I was planning to make these Mini Apple Pies using the muffin pan, but while at the store I spotted the mini tarts pan and decided to use it instead. I think these mini pies are cuter in the smaller version. I used a 3-inch round cookie cutter here; if you decide to go with the muffin pan use a bigger cookie cutter or bowl to cut the circles out of the dough. You might have to experiment a bit to see what works the best. To make the dough, start by cutting 2 sticks of butter into small cubes and place them into a freezer, and separately, about 1/2 cup of water, for about 15 minutes. Using a food processor, combine flour, sugar and salt. In a small bowl combine 3 tablespoons of sour cream and 1/3 cup icy water. Set aside. Add cubed butter into the flour mixture.
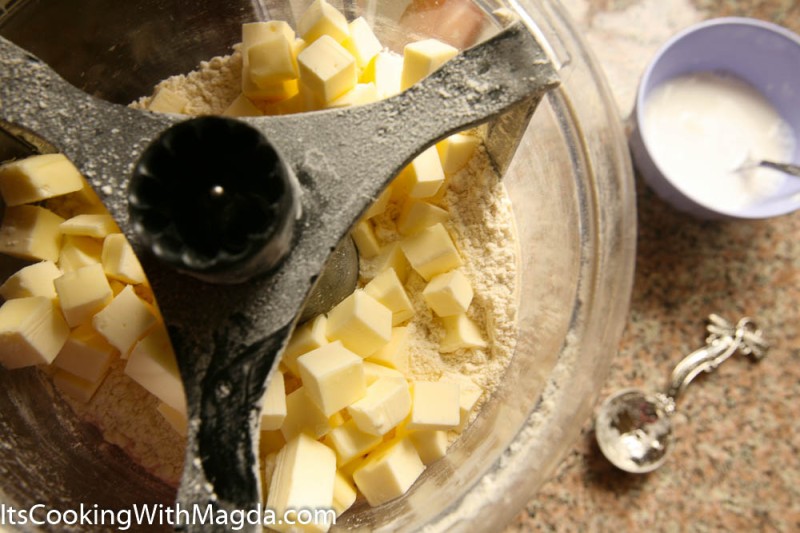 Pulse the mixture about 8-10 times, until you see pea-size chunks of butter in there. Add half of the sour cream/water mixture and pulse briefly. Add the remaining half and mix a few more times. You should see big clumps of dough. If it seems too dry, add 1-2 tablespoons of icy water and pulse a few times more.
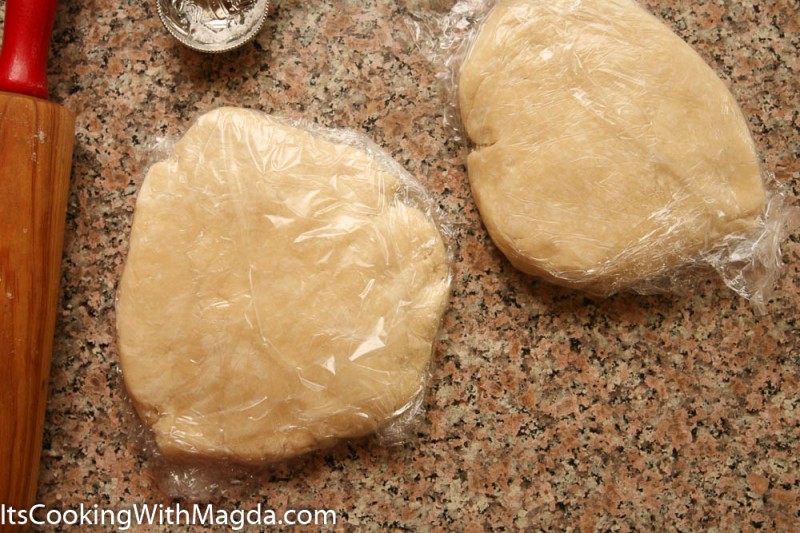
 Place the dough on plastic wrap and form a ball. Divide it into 2 disks, wrap separately and place in the fridge for at least 1 hr and up to 2 days ( or freeze it for up to 1 month).
Let the dough sit on the counter for about 10 -15 minutes before you start rolling it out. Work with only 1 disk at a time and roll it out to about 1/4-inch thickness and you should easily be able to get 12 circles out of it.
To make the leaves I used a set of 6 leaf shaped fondant cutters from Wilton’s.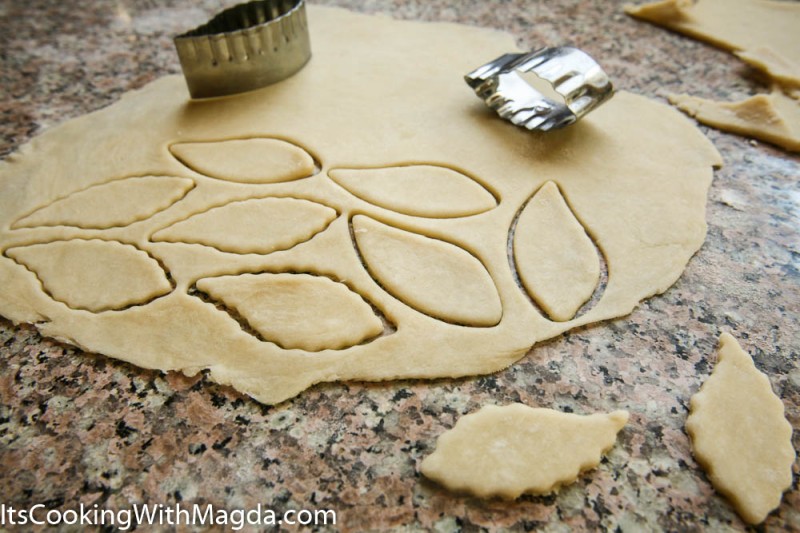 To assemble: grease the mini tart pan, place a cut out circle of dough and push it down gently. Fill up each mini tart with prepared applesauce, place the leaves on top and make sure to brush them with egg/water mixture ( 1 egg and 2 teaspoons of water). Bake in oven (preheated to 425 degrees) for 10 minutes, then lower the temperature to 350 degrees and bake another 12-15 minutes until the leaves on top are golden. Cool on a cooling rack.
 Makes: 24 mini tarts Prep time: Ready in: 3 hrs
Ingredients:
Apple Pie Filling: adjust the amount of added sugar depending on how sweet the apples are.
- 3-4 lbs apples like Pippin, Fuji, Gravenstein, Granny Smith, Golden Delicious, peeled, cored and chopped
- 1/2 cup water or apple juice
- 2-3 tablespoons lemon juice
- 1/4 cup brown sugar
- 2 tablespoons granulated sugar (optional)
- 2 teaspoons cinnamon
- 1/2 cup golden raisins
Double Crust Pie Dough: enough for 24 mini tarts, for only one batch divide everything in half.
- 2 sticks ( 16 tablespoons) butter, cubed and placed in the freezer
- 1/3 cup icy water, plus 2-3 tablespoons as needed
- 3 tablespoons sour cream
- 2 1/2 cups all-purpose, unbleached flour
- 1 tablespoon sugar
- 1 teaspoon salt
- 1 egg/2 teaspoons water mixture for brushing the leaves
Directions:
- Apple Pie Filling: peel, core and chop the apples. Put them into a large pot, add water, half of the lemon juice and bring to boil. Turn the heat to low, cover and cook, stirring often for about 30 minutes. Add sugar, cinnamon and stir again. Taste and adjust the amount of sugar and lemon juice. Cook another 5-10 minutes. If you prefer smooth applesauce, transfer it to a food processor (after some cooling down) and process till smooth. Pour into a bowl and add the raisins.
- Pie Dough: using a food processor mix flour, sugar and salt. In a small bowl mix together sour cream and 1/3 cup icy water; set aside. Add cubed, frozen butter into the flour mixture and pulse 8-10 times until you see pea-sized pieces. Pour in half of the sour cream/water mix and pulse 3-4 times, then add the remaining liquid and pulse again. When bigger clumps start forming, turn it off. If the dough seems dry, add 1-2 tablespoons of icy water and pulse 3-4 times again.
- Place the dough on the counter and divide it in half. Flatten each piece into a disk, wrap in plastic and refrigerate for at least 1 hr and up to 2 days.
- Preheat the oven to 425 degrees.
- To roll, bring it to room temperature. Sprinkle some flour onto the surface and roll the dough to about 1/4-inch thickness. Dip the 3-inch round cookie cutter into some flour and press firmly onto the dough. Repeat, leaving very little space between the circles.
- Grease the mini tart pan and place the dough circles in. Add about 2 tablespoons of the filling into each tart. Cut small leaves out of dough and place on top of each mini tart. Using a small, clean paintbrush brush each leaf with some of the egg/water mixture.
- Bake at 425 degrees for the first 10 minutes, then lower the temperature to 350 degrees and bake another 12-15 minutes until the leaves turn golden on top. Cool down on the cooling rack.
- Serve with powdered sugar or whipped cream.
Enjoy!

Looks so yum! Can’t wait to try it!
LikeLiked by 1 person
Thanks Charlotte!
LikeLiked by 1 person
Yes, love mini desserts and with Thanksgiving around the corner, mini apple pies are a must!
LikeLiked by 1 person
Thank you, Linda!
LikeLike
Very lovely and great idea!
LikeLiked by 1 person
Thanks Lynz!
LikeLiked by 1 person
You are welcome! I saw you on my good friend Marisa’s page and had to visit! I love the idea of little pies! They are delightful!
LikeLiked by 1 person
So much fun to make them!
LikeLiked by 1 person
yes I love minis! I used to make mini cream puffs and other desserts. It is so nice to have small bites!
LikeLiked by 1 person
Stay tuned! I have another recipe for mini pies coming soon.
LikeLiked by 1 person
Oh I will be waiting! I love minis! Please let me know if I miss it in my reader! I will be waiting!! I am looking for more ideas for Thanksgiving! 🙂 Thanks Magda!
LikeLiked by 1 person
I will! 🙂
LikeLiked by 1 person
Thanks 🙂
LikeLike
Pingback: Chocolate Pecan Pie | It's Cooking with Magda
Pingback: Mini Pumpkin Pies | It's Cooking with Magda
Pingback: Apple Galette with Spiced Caramel Sauce | It's Cooking with Magda